Mini-Z Maintenance Schedule
A session-by-session Mini-Z maintenance schedule. What to check after every run, every 5 sessions, and every 20 — so nothing fails on race day.
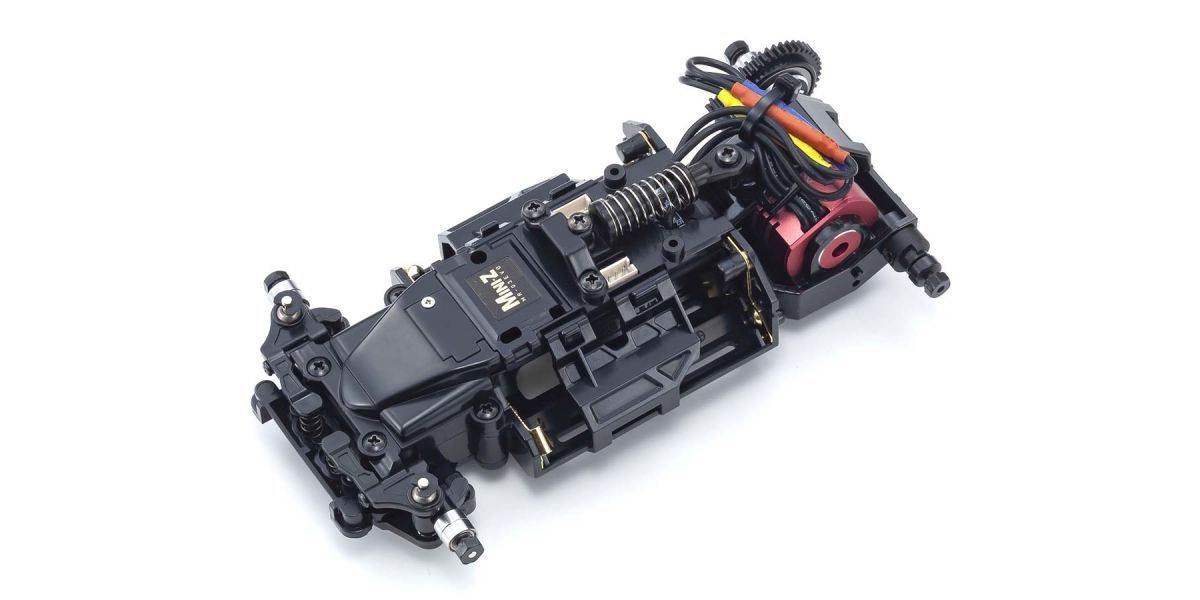
MR-03 · MR-04 · MA-020 · MX-01
Most Mini-Z problems aren’t part failures — they’re maintenance failures. A bearing that hasn’t been cleaned in months. A diff that’s bone dry. A motor mount screw that backed out three sessions ago and finally let go mid-race.
This guide gives you a simple schedule. Follow it and your car will be faster, more consistent, and cheaper to run because you’ll catch problems before they become expensive. For the pre-race version of this discipline, see My 20-Minute Pre-Race Ritual.
After Every Session (5 Minutes)
These take almost no time and prevent the most common issues.
Tires — Wipe all four tires with a clean microfibre cloth. If you used tire sauce, wipe the excess off before storing. Leaving compound on the tires between sessions degrades the rubber.
Body — Check body clips and mounting points. Hairline cracks in the body shell around the clip holes are common and get worse if ignored. Swap to a backup body if you see cracking.
Visual inspection — Flip the car over and look for anything obviously wrong: loose screws, a T-plate that’s shifted, a tie rod that’s bent. This takes 30 seconds and catches things you’d otherwise discover mid-qualifying.
Battery — Remove batteries before storage. Leaving NiMH cells in the car for weeks causes slow discharge and can lead to leaking. Store batteries in a cool, dry place.
Every 5 Sessions
This is your “pit day” maintenance. Set aside 20–30 minutes.
Bearings
Remove the wheels and spin each one by hand. They should spin freely with no grit or resistance. If a bearing feels rough, pop it out, soak it in isopropyl alcohol for 10 minutes, dry it thoroughly, and add a tiny drop of bearing oil. One drop — not a puddle.
On the MR-03 and MR-04, pay special attention to the motor mount bearings. They take the most heat and collect the most debris.
→ For bearing specs by platform, see the First 5 Upgrades guide.
Differential
Gear diff (stock): Open the diff case and inspect the gears for wear. Wipe old grease out and apply fresh diff grease. Reassemble and check for smooth operation. If the gears are chipped or the diff is notchy, replace the internals — they’re inexpensive.
Ball diff: Disassemble completely. Clean the thrust balls and plates with isopropyl alcohol. Inspect the diff rings for scoring. Reapply diff grease to the thrust balls, reassemble, and set tension. A properly maintained ball diff should feel silky smooth with zero notchiness.
→ Not sure which diff you should be running? Read Ball Diff vs Gear Diff.
Motor and Pinion
Blow compressed air through the motor to clear dust. Check the pinion gear for wear — if the teeth are rounded or chipped, replace it. On brushed motors, check the brush length and commutator condition. Brushless motors need less attention here, but still inspect the sensor wire connection.
→ Running brushless? See the Brushless Conversion guide for motor-specific care.
T-Plate and Suspension
Check that the T-plate screws are tight. Carbon T-plates can develop micro-cracks over time, especially at the screw holes. Hold the plate up to a light and look for cracks. A cracked T-plate will give you inconsistent handling that gets worse every session.
Check front spring condition — springs lose tension over time. If you’ve been running the same springs for 50+ sessions, swap them for fresh ones and note the difference.
→ More on T-plate selection in the T-Plate Setup guide.
Every 20 Sessions (Deep Clean)
This is a full teardown and inspection. Budget an hour.
Full Disassembly
Strip the car down to the chassis. Remove the motor, ESC, servo (if separate), diff, all suspension components, and all electronics. Clean the chassis with isopropyl alcohol and a soft brush. Look for cracks, stripped screw holes, or worn mounting points.
Electronics Check
- ESC board — Inspect solder joints. Look for cold joints or cracked traces, especially around the motor leads. Re-solder anything that looks questionable.
- Servo — On the MR-03, the built-in pot servo can develop dead spots. Test full lock-to-lock movement. If the steering is jerky or doesn’t center cleanly, the servo is wearing out.
- Gyro — Clean the mounting area. Make sure it’s firmly attached and hasn’t shifted.
→ For gyro tuning after remounting, see the Gyro Setup guide.
Screw Replacement
Mini-Z screws are tiny and strip easily. Every 20 sessions, replace any screw that feels loose in its hole or whose head is starting to round out. Keep a bag of spares — they cost almost nothing but a stripped screw mid-race weekend is a disaster.
→ See the Tools Guide for the exact wrench sizes and screw specs by platform.
Motor Replacement (Brushed Only)
Brushed motors have a finite lifespan. If you’re running stock class with a brushed motor, expect to replace it every 40–60 sessions depending on how hard you drive. Signs of a dying motor: lower top speed, higher running temperature, inconsistent throttle response.
Brushless motors last significantly longer — motor replacement is usually not a concern unless you’ve damaged the sensor board or bearings.
Platform-Specific Notes
MR-03
- The pot servo is the weakest point. Budget for a replacement every 6–12 months of regular racing.
- The rear motor pod tends to collect debris between the pod and chassis. Clean this gap during deep cleans.
- Check the upper arm ball studs for wear — they can develop play over time.
→ Full platform details in the MR-03 Upgrade Guide.
MR-04
- The digital servo is more durable than the MR-03’s pot servo but still benefits from periodic centering checks.
- Lower center of gravity means less body roll stress on the T-plate, so T-plates tend to last longer.
- The battery tray clips can weaken — inspect them during deep cleans.
→ Full platform details in the MR-04 Upgrade Guide.
MA-020
- AWD means twice the drivetrain wear. Check front and rear diffs on the same schedule.
- The front universal joints are a wear item. Inspect for play and replace when sloppy.
- Center shaft and front drive components need grease — don’t neglect the front end.
→ Full platform details in the MA-020 Upgrade Guide.
MX-01
- Crawler speeds mean less wear overall, but rocks, dirt, and sand are brutal on bearings.
- Clean bearings more frequently if you run on dirty surfaces.
- Check the suspension links for bent tie rods — the MX-01 takes more side impacts than racers.
→ Full platform details in the MX-01 Crawler Guide.
Quick Reference Table
| Task | Frequency | Time | What to look for |
|---|---|---|---|
| Wipe tires | Every session | 1 min | Excess sauce, embedded debris |
| Check body clips | Every session | 30 sec | Cracks at clip holes |
| Visual inspection | Every session | 30 sec | Loose screws, shifted parts |
| Remove batteries | Every session | 30 sec | — |
| Clean bearings | Every 5 sessions | 10 min | Grit, rough spin |
| Service diff | Every 5 sessions | 10 min | Dry grease, worn gears, scoring |
| Inspect motor/pinion | Every 5 sessions | 5 min | Worn teeth, dust buildup |
| Check T-plate | Every 5 sessions | 2 min | Micro-cracks, loose screws |
| Full teardown | Every 20 sessions | 60 min | Cracks, stripped holes, worn electronics |
| Replace screws | Every 20 sessions | 10 min | Rounded heads, loose fit |
| Replace motor (brushed) | Every 40–60 sessions | 15 min | Low speed, high temp |
Stick to the schedule and your car will thank you with consistent, predictable performance — which is worth more than any upgrade you can bolt on.
1.5mm and 2.0mm hex drivers, 4.5mm and 5.5mm nut drivers, Phillips and flat head. Covers everyday Mini-Z maintenance.
Shop →Complete rebuild kit. Adds 0.9mm hex and additional drivers to cover every fastener on the car.
Shop →Ball-end tips allow angled access to tight spaces. Useful for suspension links and motor mount screws.
Shop →Pro-4 series 0.9mm hex driver. The size most often missing from generic sets. Essential for Mini-Z.
Shop →Tapered reamer for opening body post holes. Curved scissors for trimming lexan bodies cleanly.
Shop →